

Installation Steps
Prerequisites
IMPORTANT: Please note that the extension will not function unless the Azure OpenAI Service Endpoint, API Key, and Deployment Model Name (the custom name assigned during deployment creation in the Azure OpenAI Service) are properly configured.
Compatibility
The Work Item Assistant successfully integrates with various Azure OpenAI chat models, including:
1. GPT-4-32k
2. GPT-4.1 (2025-04-14) (with 32K context length)
3. Any of the latest GPT models that support a minimum token limit of 32K or more from the Azure AI Foundry
These models are designed to deliver precise and context-aware responses to user inquiries, thereby boosting efficiency in the creation and management of work items within Azure DevOps.
Configuration
Step 1: Install the Extension
1. Navigate to the Azure DevOps Marketplace and search for the AI Work Item Assistant or access it from the Azure DevOps marketplace: AI Work Item Assistant - Visual Studio Marketplace.
2. Click on Get it free to initiate the installation process.
To successfully install and set up the AI Work Item Assistant extension, it is crucial to have access to the following resources and permissions:
ADO Permissions:
1. Require you to have Organization Administrator level permissions (Project Collection Administrator) to install and configure extensions in your Azure DevOps organization.
2. Require you to have Project Administrator level permissions to configure extensions in your respective Azure DevOps project.
Azure OpenAI Service: Additionally, a well-configured Azure OpenAI Service is vital for the extension's operation. Without this connection, the assistant will be unable to process any queries or provide work item suggestions. The connection settings for the Azure OpenAI Service can be configured at both the organizational level and the project level.

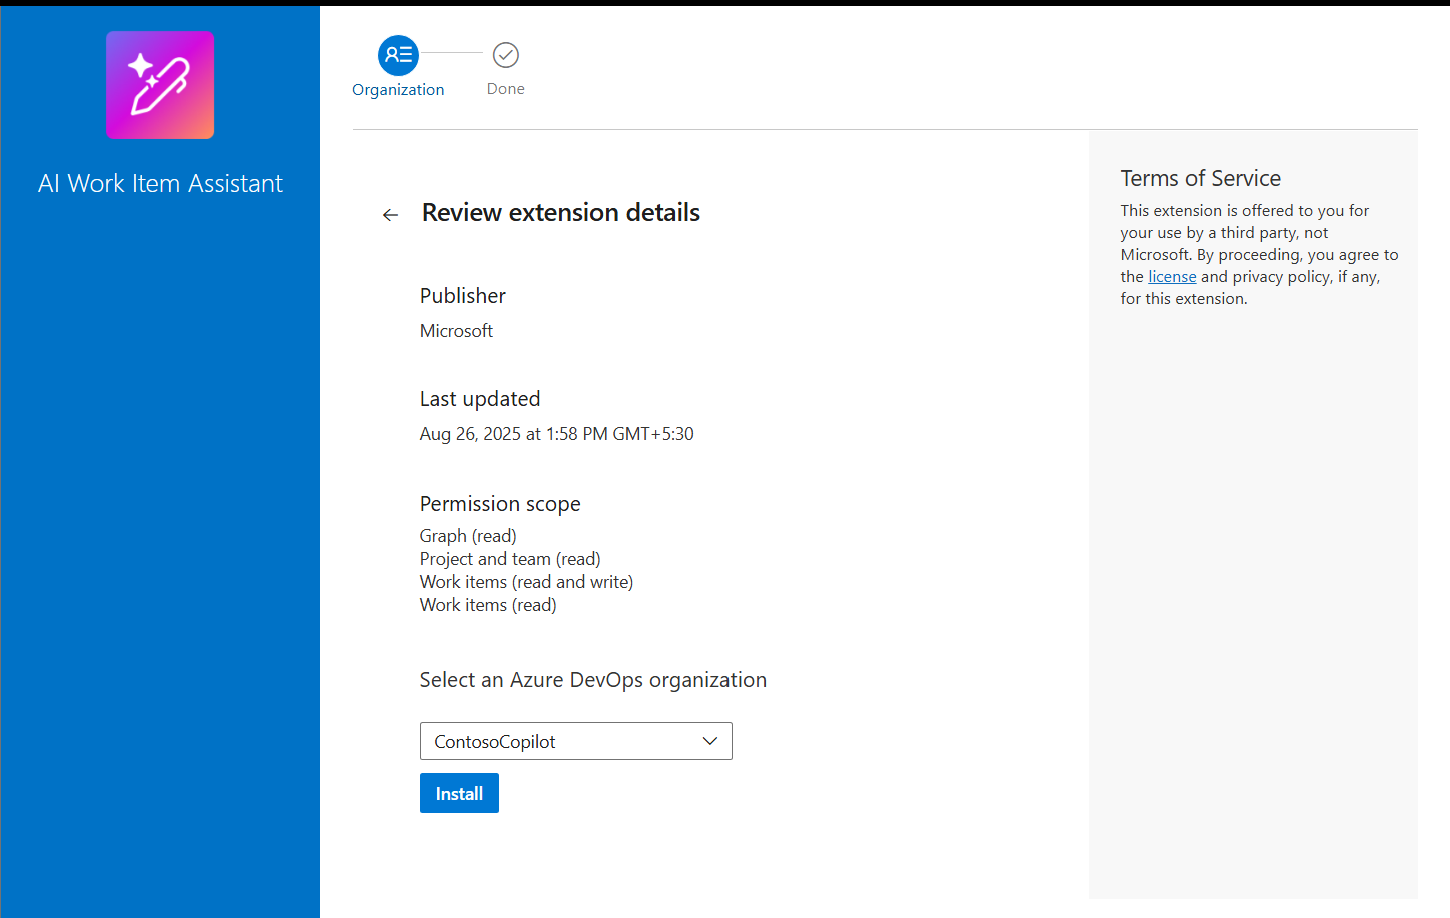
3. Select your Azure DevOps organization and click on Install to deploy the extension.
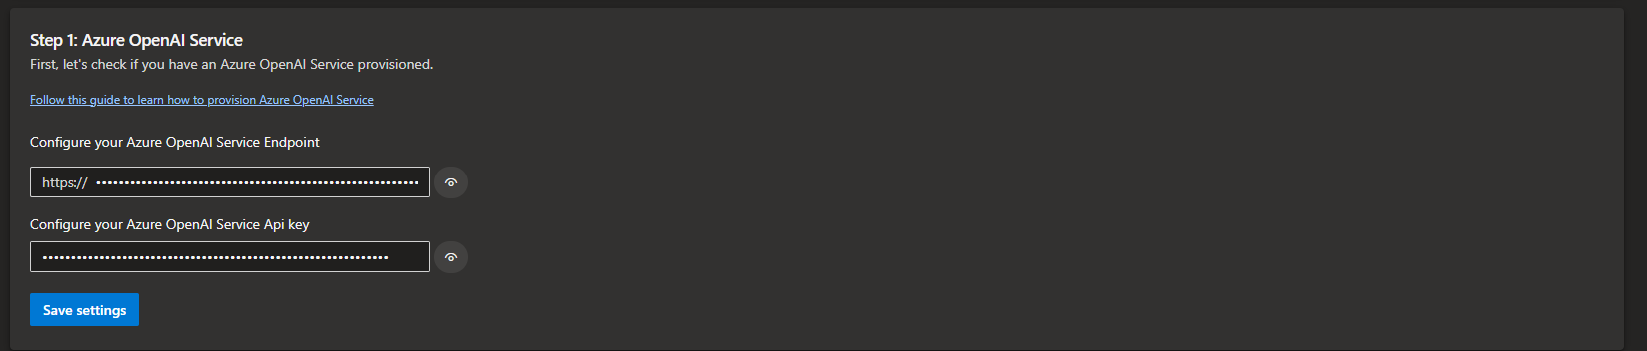
Step 2.1: Configure Your Azure OpenAI Service in Organization/Project Settings
You will first need an Azure OpenAI resource. If you already have one, enter the OpenAI Service Endpoint and API Key in the fields provided. These details can be found in the Azure Portal under the Keys and Endpoint section. Please refer to this Document to Create OpenAI Service -
Please refer to this Document to Create Azure OpenAI Service - Provision Azure OpenAI Service
Step 2.2: Provide Your Model Deployment Name
Enter the Model Deployment Name for the model you want to use. If a model has not been deployed yet, follow the Deploy Model in AI Foundry to create one in Azure AI Foundry.
Models above GPT-4 with a minimum of 32 tokens are supported.
After deploying the model, copy the Model Deployment Name and enter it in the Step 2 field. Click Save and then Validate.

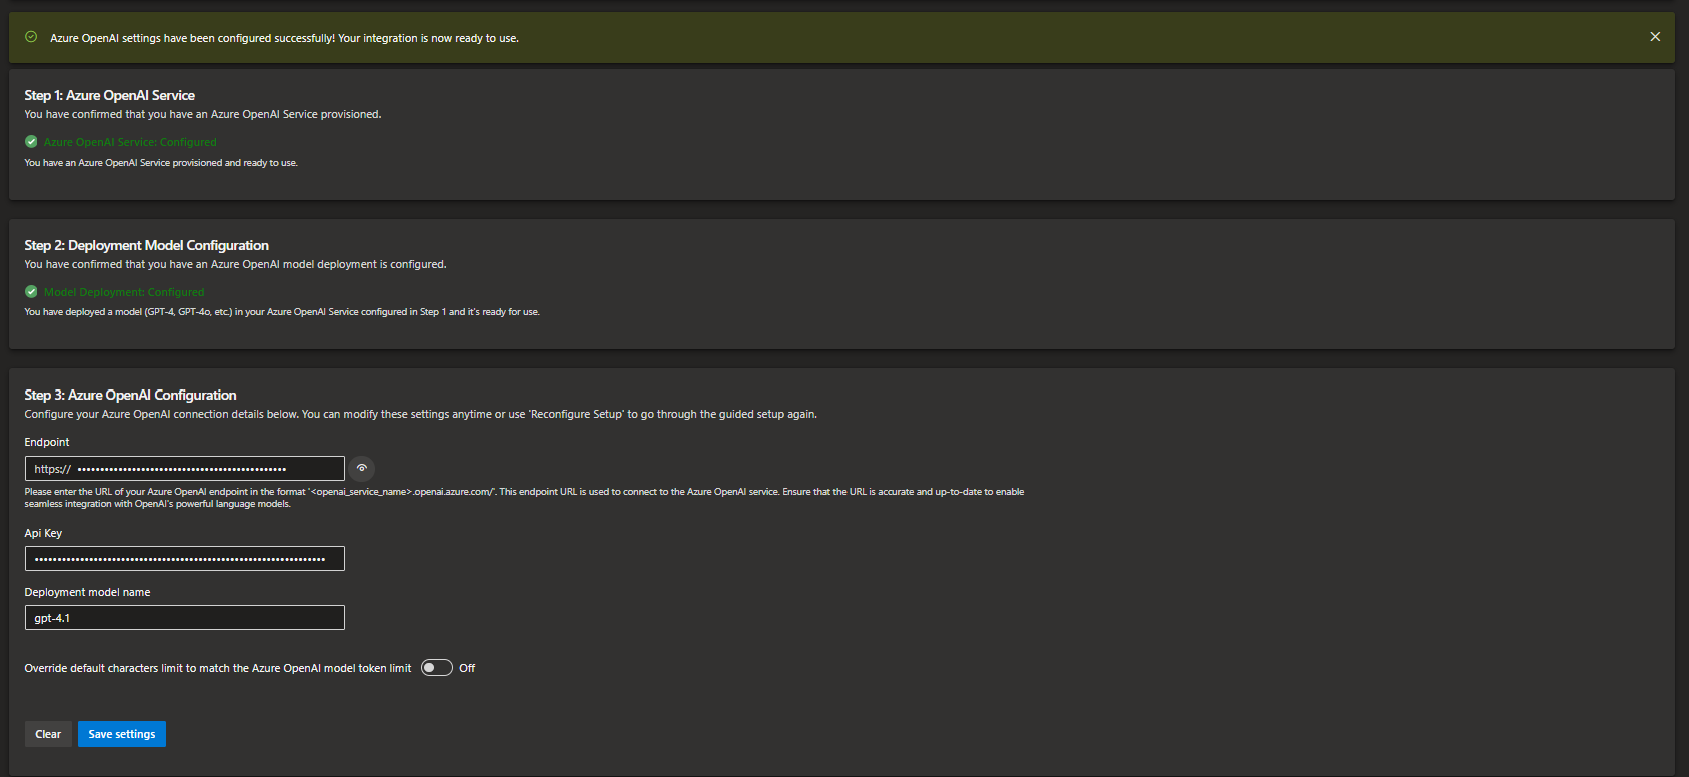
Step 3: Validate Configuration
• If the validation is successful, a green banner will appear indicating that the connection and settings have been configured correctly.
• If the validation fails, the related issues will be highlighted within the Step Card. Review the details and update the incorrect fields before trying again.
You can also refer to the following video walkthrough that demonstrates all the above steps — from configuring the Azure OpenAI Service to validating the settings successfully -
Step 4: Set Up Flighting and Manage Controlled Access for the Extension
Easily set up flighting to provide granular access to selected projects or organizations. Manage controlled access to entire or specific feature in the AI Work Item Assistant extension suite, ensuring a smooth and secure rollout experience. Detailed instructions are available on the Flighting Step page.
Step 5: Configure Azure Document Intelligence Service
Set up the Azure Document Intelligence (Form Recognizer) service within the AI Work Item Assistant extension to enable your end users to import documents when utilizing the AI Work Item Generator extension in Boards.
Refer to the instructions on the Document Intelligence Settings page to set up and connect it with the AI Work Item Assistant extension from project settings.
Note that only documents labeled as public or with general sensitivity can be uploaded using the Azure Document Intelligence Service. Documents with a highly sensitive label attached may not be processed due to security and compliance reasons.
Step 6: Add or modify out-of-the-box or custom Azure DevOps work item types
Configure the default or personalized custom work item types from your project by adhering to the guidelines on the Work Item Types Settings page, covering field specifications, layout/format, and exclusion rules that AI applies to produce data for every work item type field within each extension by end users.
Step 7: Add or modify RAG Context settings using Azure AI Search
Refer to the instructions on the RAG Contexts Settings page for setting up an Azure AI Search Service resource and configure the AI Work Item Assistant extension for enhanced project and user context when creating ADO work items.
Step 8: Override Azure OpenAI Deployment Model for AI Work Item Insights (Optional)
Refer to the instructions on the AI Work Item Insights Settings page to override the model to be used specifically for the AI Work Item Insights feature along with the starter prompts to use this feature.
Troubleshooting
If the extension does not function as expected, check the following:
1. Ensure your Azure OpenAI Service connection is active and properly configured.
2. Verify that the AI Work Item Assistant is set to use an Azure OpenAI model with at least 32K tokens.
3. Confirm that you have the required administrator permissions to configure extensions in your organization.