

Add Project or User Level Context
Overview
Expanding the responses of the AI Work Item Assistant beyond its training data is possible by incorporating additional context from other data sources, such as the user's input. This approach enhances the creation of work items by grounding them in contextual documents at both the project and user level.
This guide provides detailed walkthrough for setting up an Azure AI Search Service resource, copying the Endpoint and API Key, and set up the AI Work Item Assistant extension for enhanced project and user context when creating ADO Work Items.
Prerequisites
• Azure Portal access with permission to create resources and assign roles.
• Access to Azure DevOps with permissions to manage extensions.
• You must be part of the Project Administrators ADO team/group to add or modify the contexts settings.
Steps to create and configure Azure AI Search to add context
🟢 Step 1: Sign in to the Azure Portal
1. Go to https://portal.azure.com.
2. Sign in with your Azure account.
🟢 Step 2: Search for “Azure AI Search”
1. In the upper-left corner of your dashboard, select Create a resource.

2. Use the search box to find Azure AI Search.

🟢 Step 3: Create a New Search Service
1. Click on Create.
2. You’ll land on the Basics tab. Fill in the details:
• Subscription → Choose your active subscription
• Resource group → Create a new one (e.g., rg-ai-search) or pick an existing one
• Service name → A unique name (e.g., myaisearchdemo)
• Region → Pick the region closest to your users (e.g., West US2, East US)
• Pricing tier → Select an appropriate pricing tier based on your needs or start with Standard for better usage
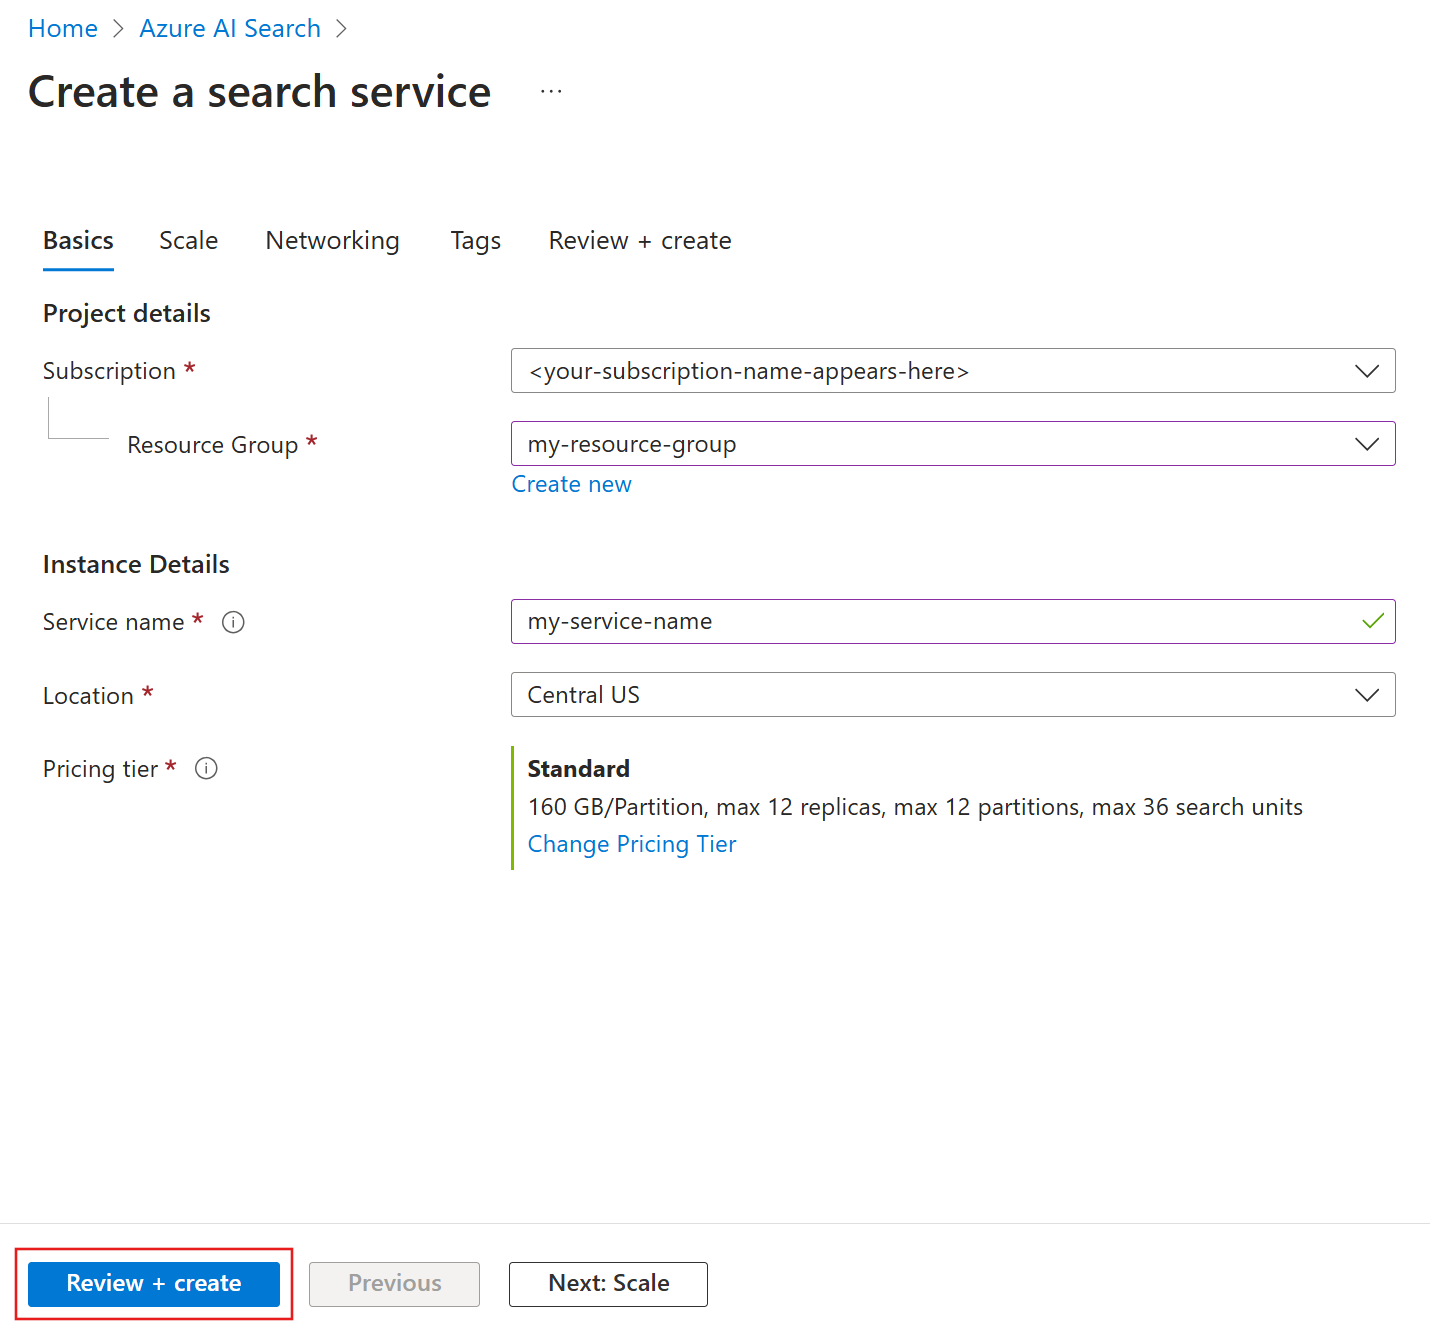
🟢 Step 4: Review + Create
1. Click Review + Create.
2. Azure will validate your settings.
3. Hit Create and wait for deployment (usually ~1–2 minutes).
🟢 Step 5: Go to Your Search Service
1. Once deployment is done, click Go to resource.
2. You’ll now see your Azure AI Search overview page.
🟢 Step 6: Copy Endpoint and Key
1. In the left-hand menu, select Keys.
• Here you’ll see Admin keys (Key1, Key2) and Query keys.
• Copy Key1 (you’ll need this in apps).
2. In the left-hand menu, select Overview.
• Copy the Endpoint URL (e.g., https://myaisearchdemo.search.windows.net).
✅ Save these safely — you’ll use them to connect the AI Work Item Assistant extension with Azure AI Search.

🟢 Step 7: Create a text embedding model
Follow Azure OpenAI Service Configuration to create or use an existing Azure OpenAI Service and then create an embedding model deployment
within the Azure OpenAI Service resource created.

🟢 Step 8: Update the Azure AI Search Settings in AI Work Item Assistant
1. Navigate to Project Settings in Azure DevOps:
• Open your Azure DevOps project and go to Project Settings in the lower-left corner.
• Under Extensions, select AI Work Item Assistant extension.
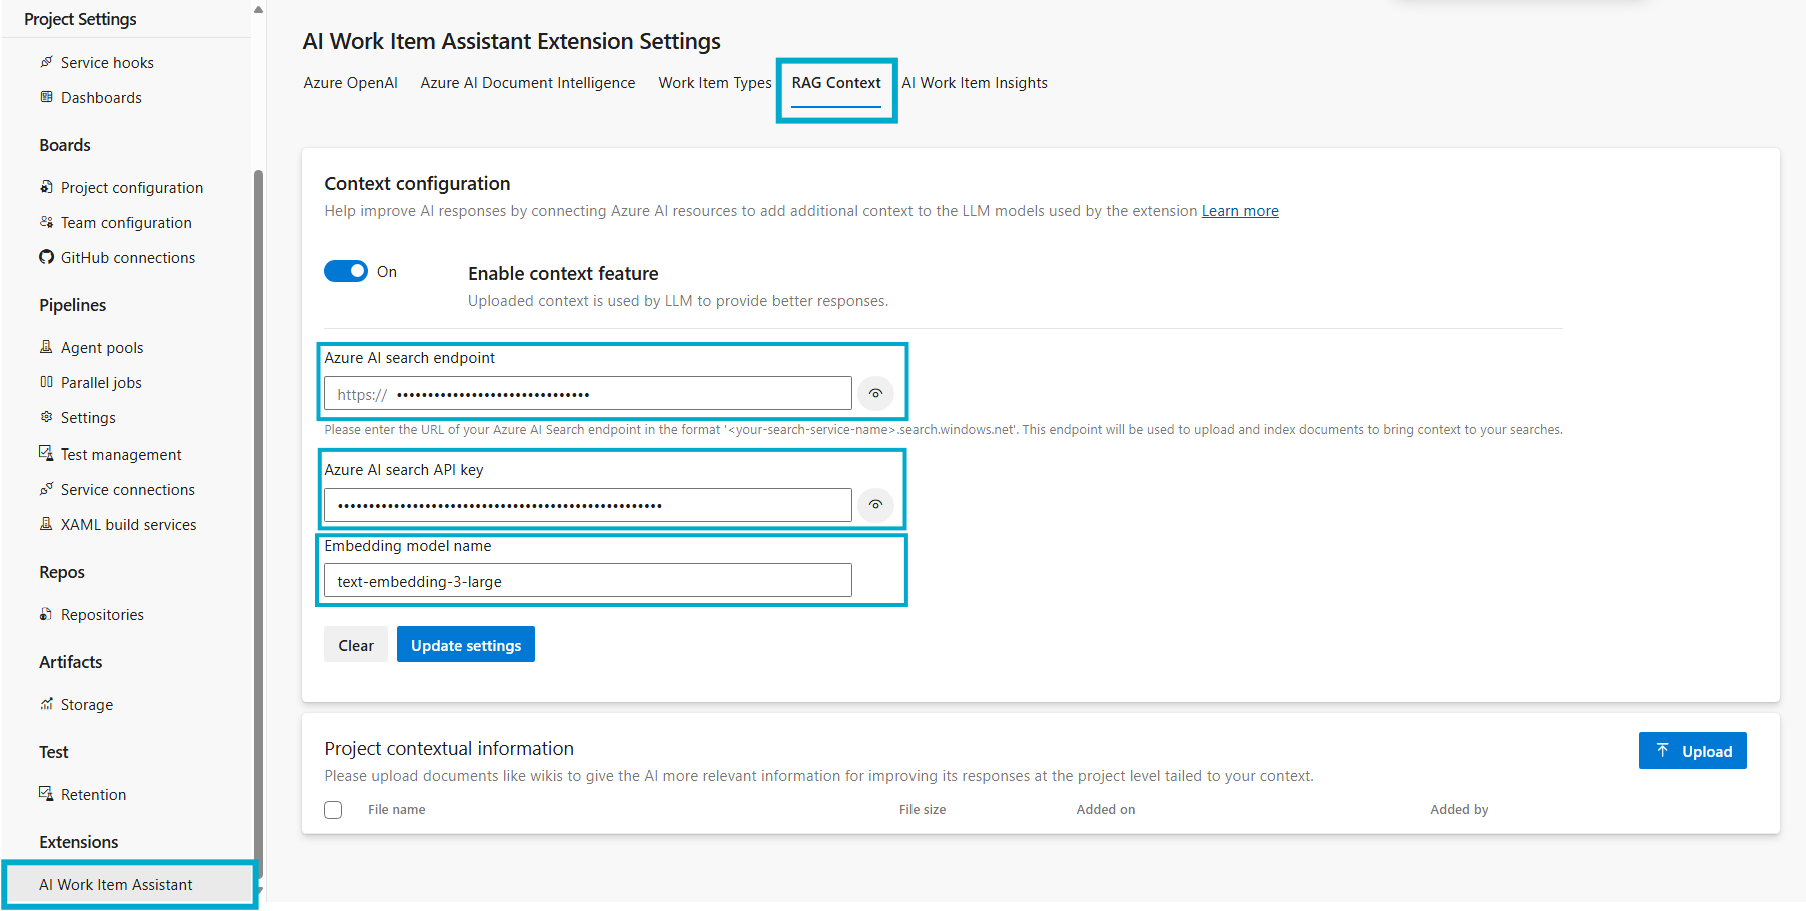
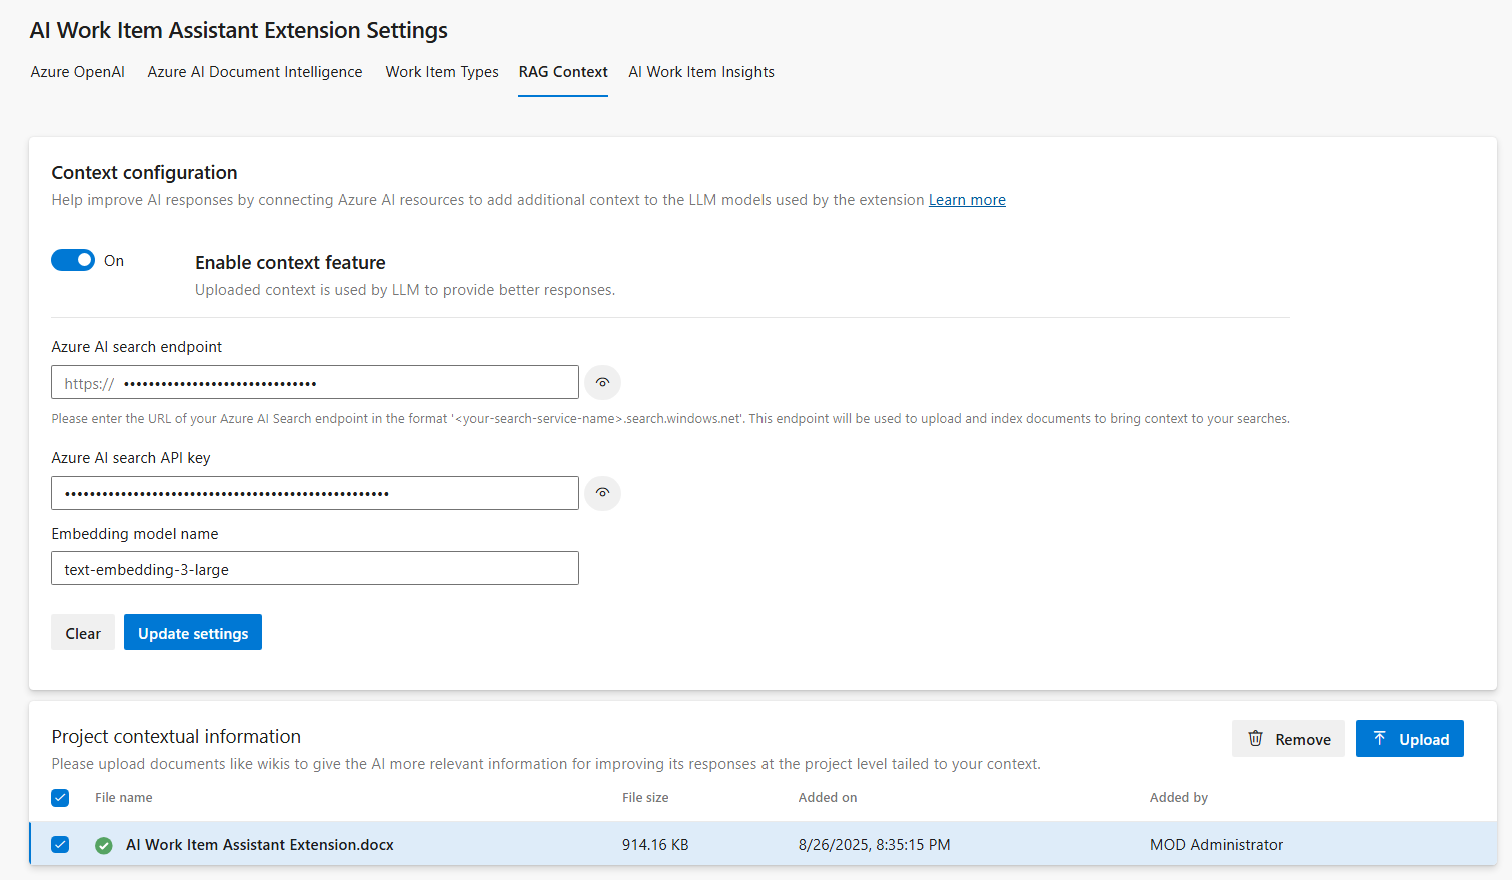
2. Configure Extension Settings:
• Go to the RAG Context tab.
• Ensure the Enable context feature toggle is set to On to allow Azure AI to use uploaded files as context when generating responses.
• Locate fields for Azure AI Search endpoint, Azure AI Search API key and Embedding model name.
• Azure AI Search endpoint: Enter the Search Service Endpoint URL copied earlier.
• Azure AI Search API key: Enter the Search Service API key copied earlier.
• Embedding model name: Enter the Azure OpenAI Embedding model deployment name created in previous steps.
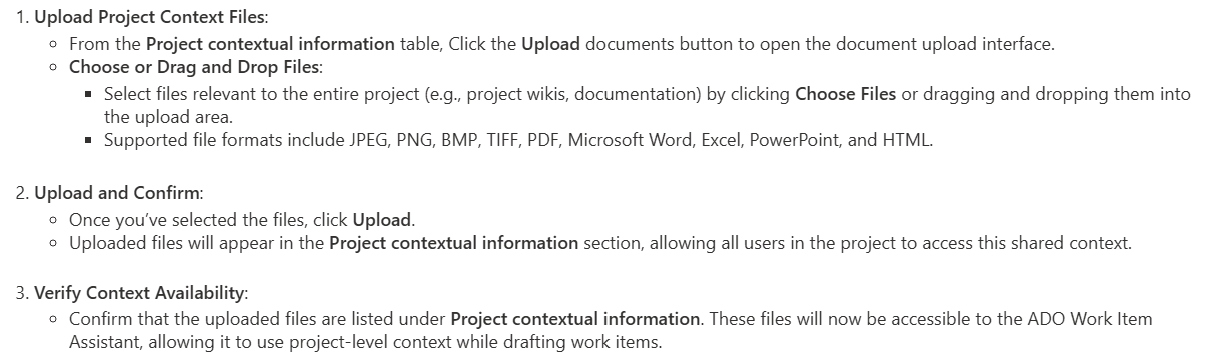
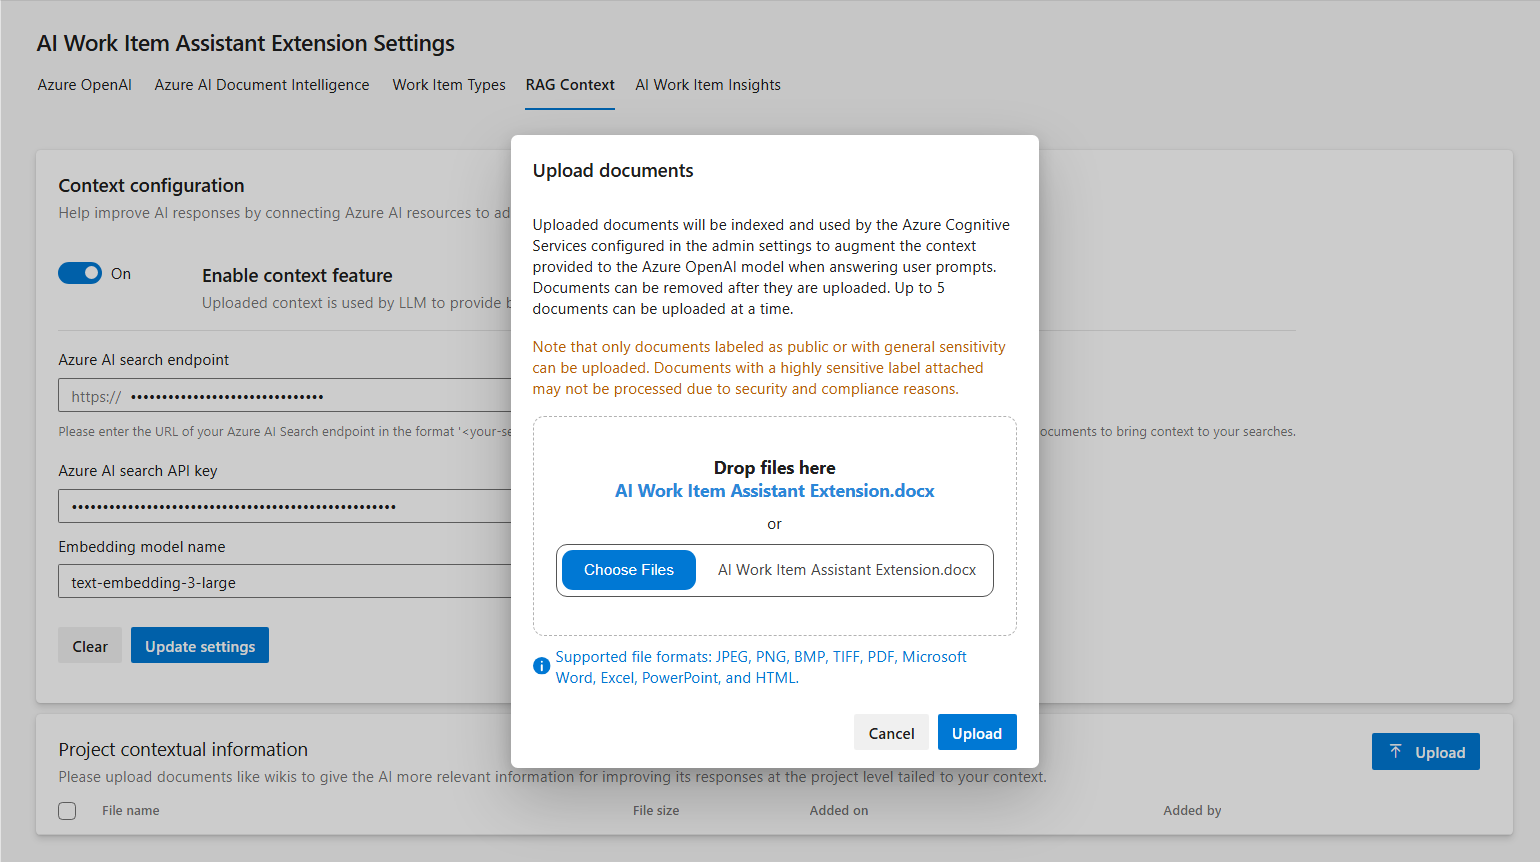
Add Project-Level Context by Uploading Files

To continue, please return to the installation steps to ensure all configurations are correctly applied. Following the setup process carefully guarantees a smooth and successful installation experience.
Back to Installation StepsNOTE: Uploaded documents should be labeled as public or with general sensitivity to comply with security and compliance requirements.
Documents labeled as highly sensitive may not be processed. This setup allows the AI Work Item Assistant extension to use both project and user-level context, improving the quality of suggestions and drafts generated for Azure DevOps work items.