

Azure Document Intelligence Service Configuration
Overview
This guide walks you through creating an Azure Document Intelligence (Form Recognizer) service in Azure Portal and configuring it in the AI Work Item Assistant extension.
Azure AI Document Intelligence is a cloud-based Azure AI service that uses machine-learning models to extract text from your uploaded documents.
Step 1: Create Azure Document Intelligence Service
1. Sign in to Azure Portal
• Go to https://portal.azure.com.
• Log in with your Azure credentials.
2. Create a New Resource
• Click Create a resource from the left menu.
• In the search bar, search for Document Intelligent and select it.
• Select Create.
3. Configure the Service
• Fill out the Create Form Recognizer fields with the following values:
• Subscription: Select your current subscription.
• Resource group: The Azure resource group that contains your resource. You can create a new group or add it to an existing group.
• Region: Select your local region.
• Name: Enter a name for your resource. We recommend that you use a descriptive name, for example, YourNameDocumentIntelligence.
• Pricing tier: The cost of your resource depends on the pricing tier you choose and your usage. For more information, see Pricing details. You can
use the free pricing tier (F0) to try the service. You can upgrade later to a paid tier for production.
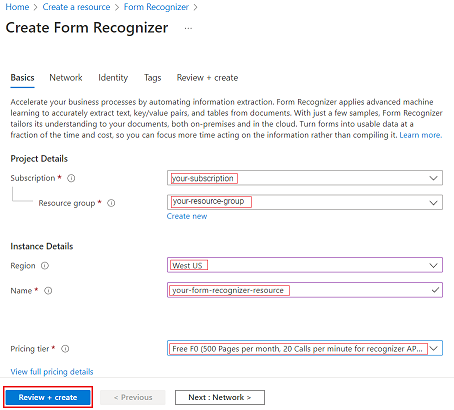
4. Review and Deploy
• Select Review + create.
• Azure runs a quick validation check. After a few seconds, a green banner appears that says Validation Passed.
• After the validation banner appears, select Create.
• A new page opens that says Deployment in progress. After a few seconds, a message appears that says Your deployment is complete.
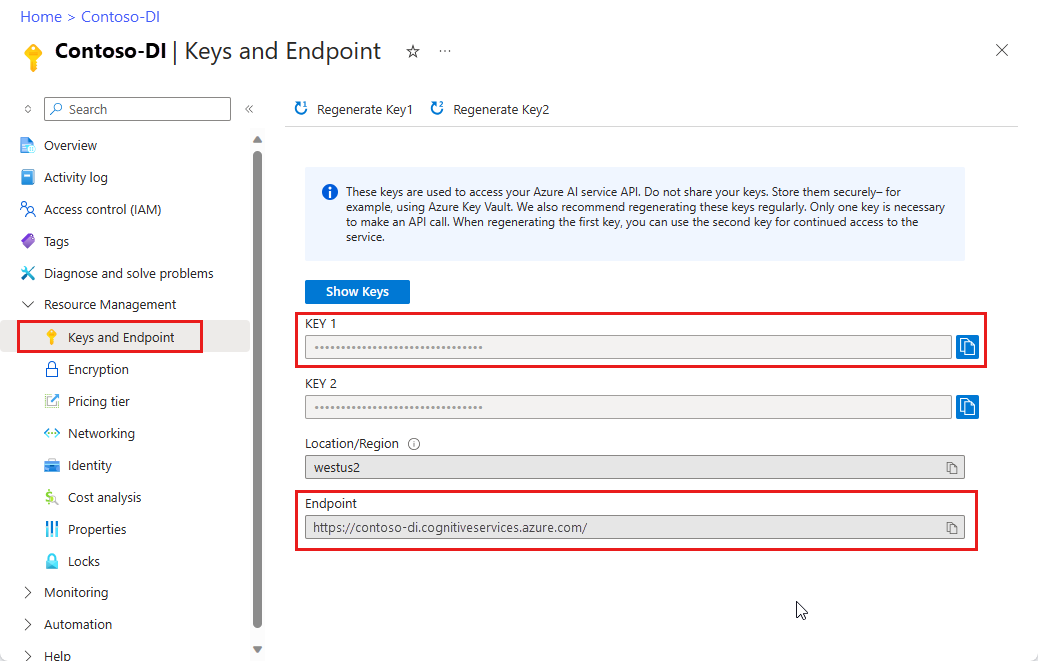
5. Get endpoint URL and keys
• After you receive the message, select Go to resource.
• Navigate to Keys and Endpoint under Resource Management on the left pane.
• Copy the key and endpoint values from your Document Intelligence resource. Paste the values in a convenient location, such as Notepad. You
need the key and endpoint values to connect your application to the Document Intelligence API from the ADO Work Item Assistant
extension project settings
Step 2: Configure in AI Work Item Assistant
1. Open AI Work Item Assistant Settings
• Go to your Azure DevOps project.
• Navigate to Project Settings → Extensions → AI Work Item Assistant.
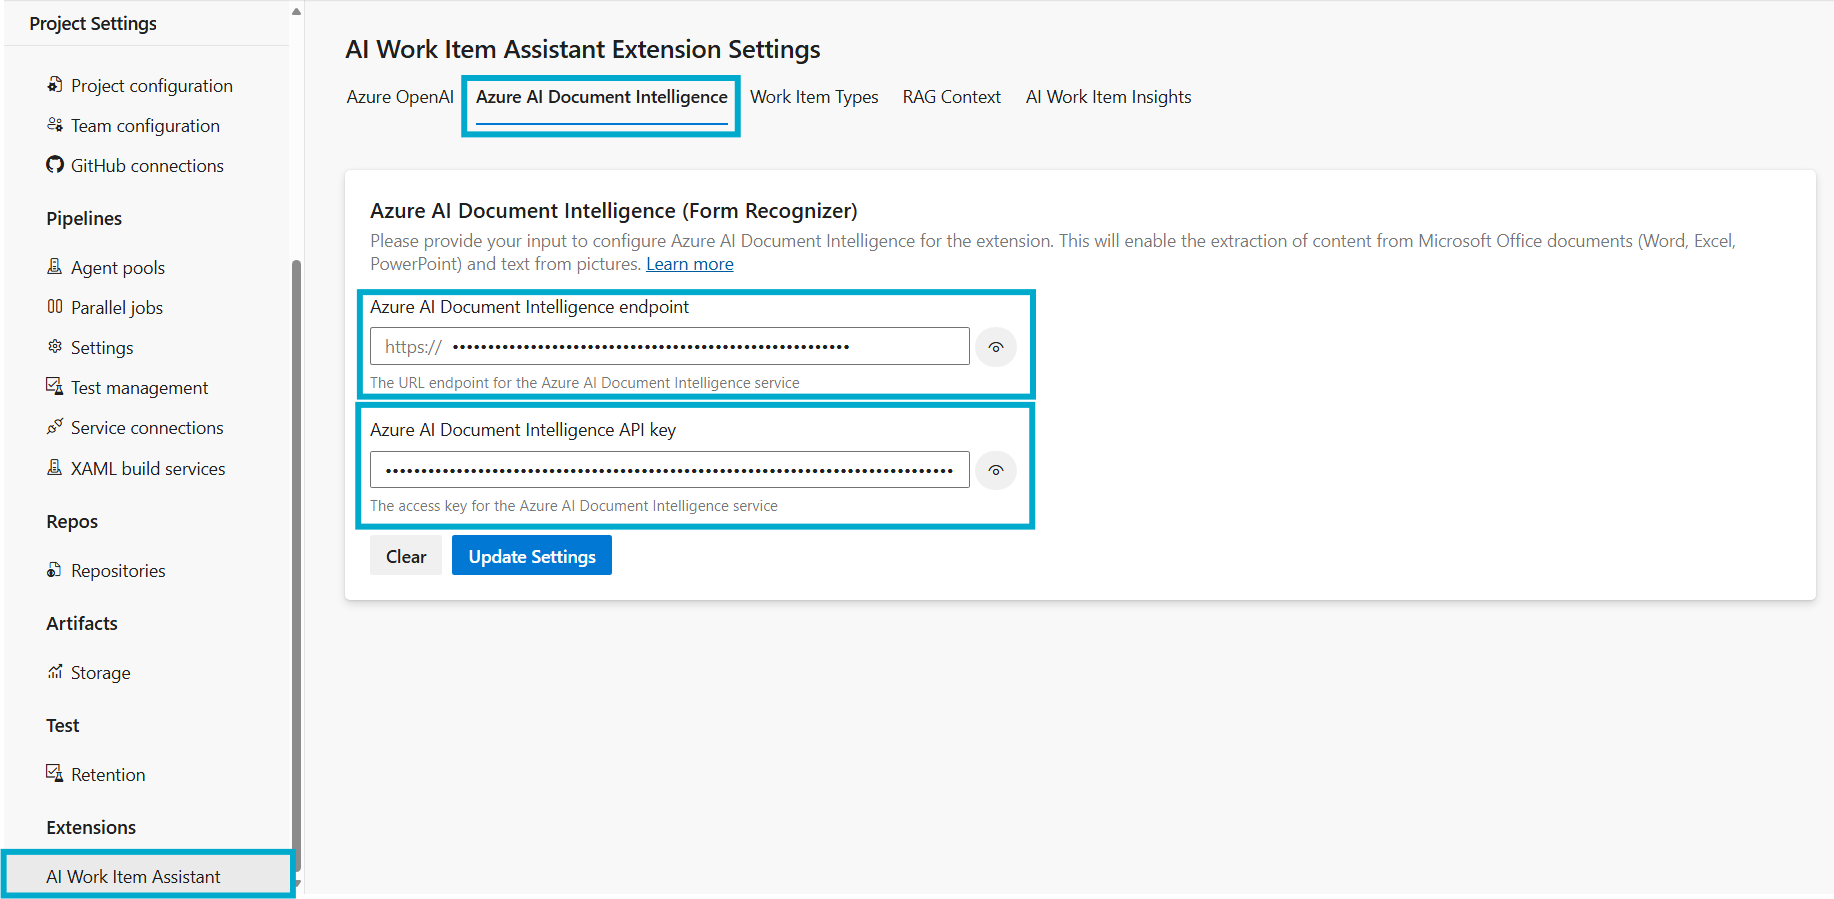
2. Select Azure AI Document Intelligence Tab
• Click on Azure AI Document Intelligence.
3. Enter Details
• Paste Endpoint URL of the Azure Document Intelligence Service copied in previous step into the Endpoint field.
• Paste API Key into the API Key field.
4. Save Settings
• Click Update Settings.
🎉 You’re Done!
Your AI Work Item Assistant extension is now connected to Azure Document Intelligence, enabling users to import documents through the AI Work Item Generator Extension from Boards.
To continue, please return to the installation steps to ensure all configurations are correctly applied. Following the setup process carefully guarantees a smooth and successful installation experience.
Back to Installation Steps🔍 Troubleshooting Tips
• Invalid Key or Endpoint
• Ensure you copied the full endpoint URL and API key without extra spaces.
• Service Not Responding
• Check if the resource is in Running state in Azure.
• Verify your Azure subscription is active.
• Authentication Failed
• If you regenerated keys, update the new key in ADO settings.