

Azure OpenAI Service Configuration
Overview
Learn how to set up and configure the Azure OpenAI Service to meet your specific needs. This includes selecting the right model and adjusting parameters for optimal performance. Following this guide ensures the successful integration of Azure OpenAI with your AI Work Item Assistant extension.
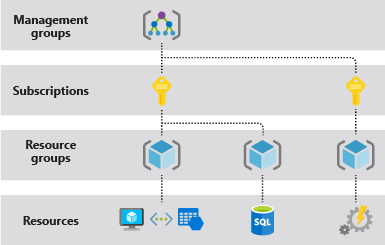
Step 1: Create a Resource Group
Create a resource group which is defined as a container that holds related resources for an Azure solution. The resource group can include all the resources for the solution, or only those resources that you want to manage as a group.
1. Log into Azure Portal
• Navigate to Azure Portal and log in with your credentials.
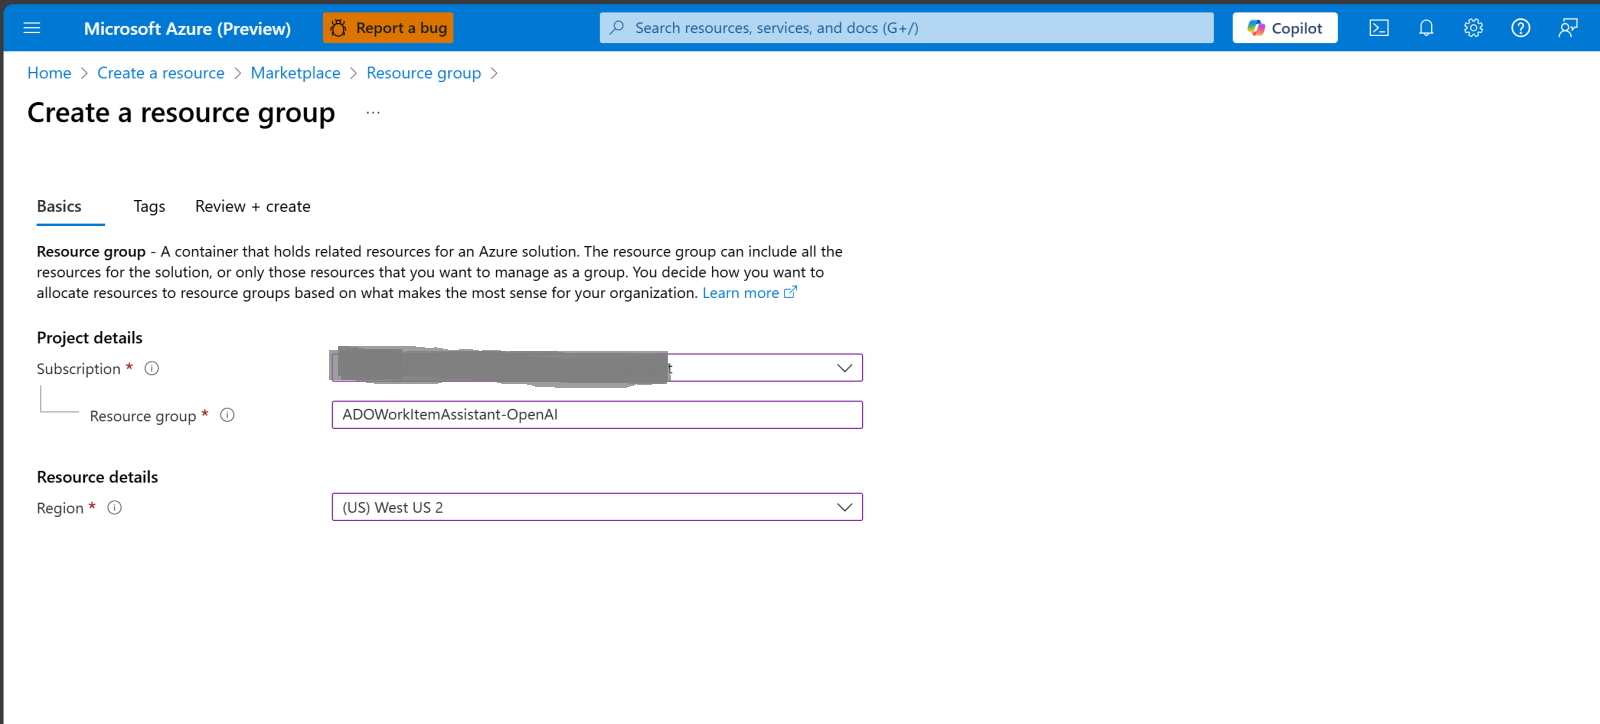
2. Create a Resource Group
• In the left-hand menu, select Resource groups.
• Click + Create to initiate resource group creation.
• Provide the following details:
⁌ Subscription: Select your Azure subscription.
⁌ Resource Group Name: Enter a unique name for your resource group.
⁌ Region: Choose the region (e.g., East US, West Europe).
• Click Review + Create and then Create.
Step 2: Create an Azure OpenAI Resource
The Azure OpenAI Service provides access to OpenAI's powerful language models, including GPT-4, GPT-3.5-Turbo, and Embedding models.
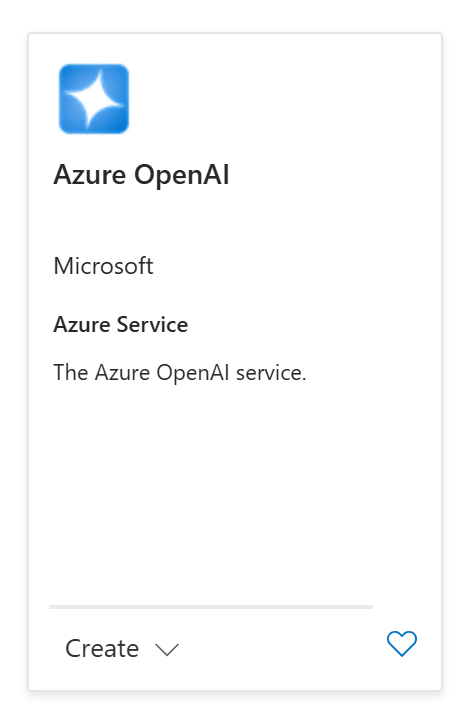
1. Navigate to Create a New Resource: In the Azure Portal, click Create a resource from the left-hand menu.
2. Search for Azure OpenAI: In the search bar, type Azure OpenAI and select Azure OpenAI Service from the search results. When you locate the service, Click Create.
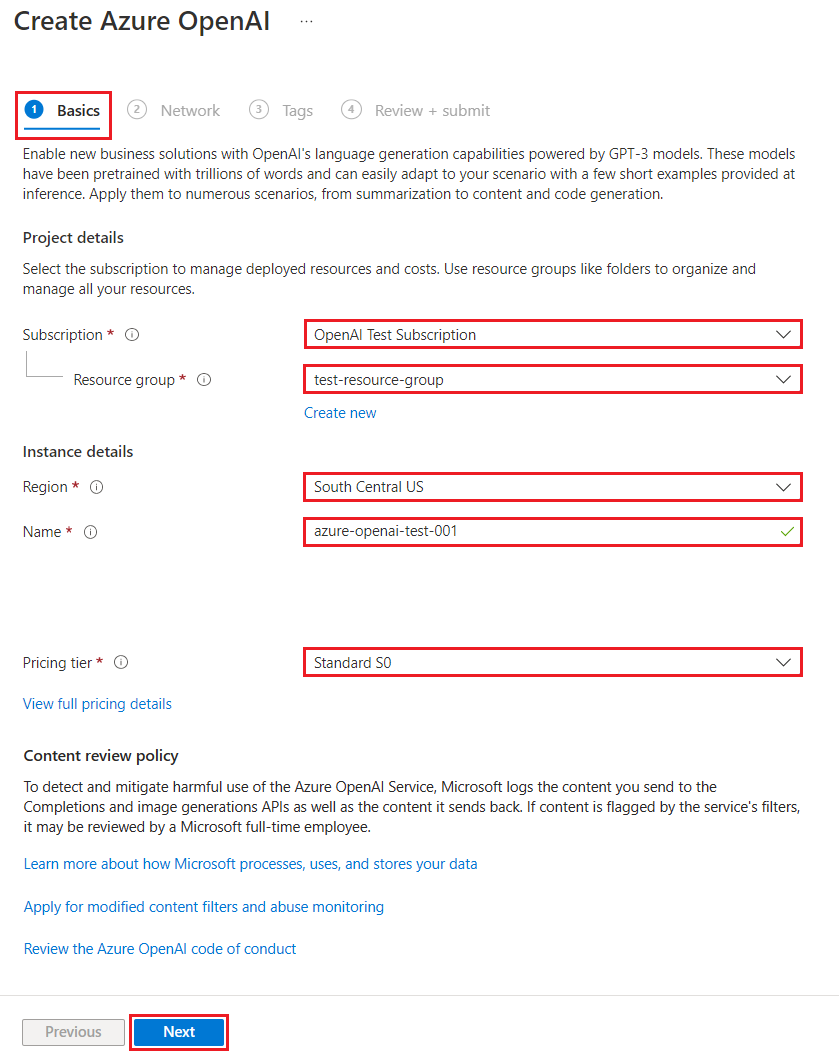
3. Configure the Azure OpenAI Service
• On the Create Azure OpenAI page, provide the following information for the fields on the Basics tab:
⁌ Subscription: Select the appropriate subscription.
⁌ Resource Group: Select the resource group created in Step 1.
⁌ Region: Select a region (ensure it matches the resource group region).
⁌ Name: Provide a name for your OpenAI resource.
⁌ Pricing Tier: Select the appropriate pricing tier. Minimal pricing tier of Standard S0 is recommended.
• Select Next to configure the Networking and Tags settings or leave them as default.
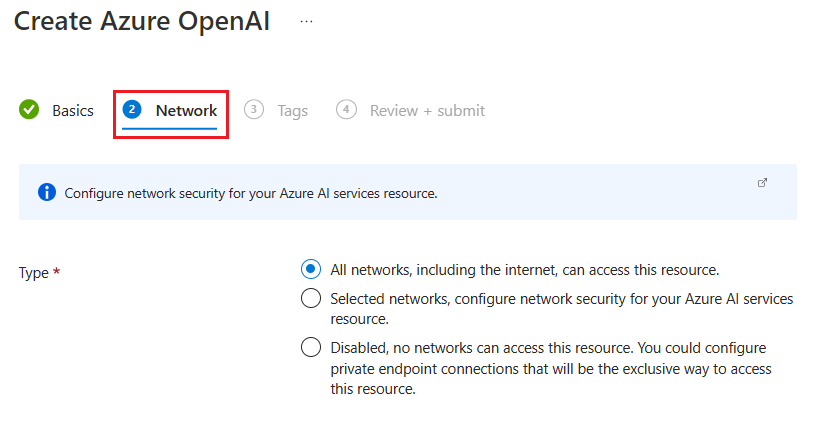
4. Configure Networking and Tags
• Networking: Leave the default settings. The Network tab presents three options for the security Type:
⁌ Option 1: All networks, including the internet, can access this resource.
⁌ Option 2: Selected networks, configure network security for your Azure AI services resource.
⁌ Option 3: Disabled, no networks can access this resource. You could configure private endpoint connections that will be the exclusive way
to access this resource.
Choose Option 1 so the AI Work Item Assistant can access it once configured.
• Select Next and configure any Tags for your resource, as desired. Tags: Add tags if required, then click Review + Create.
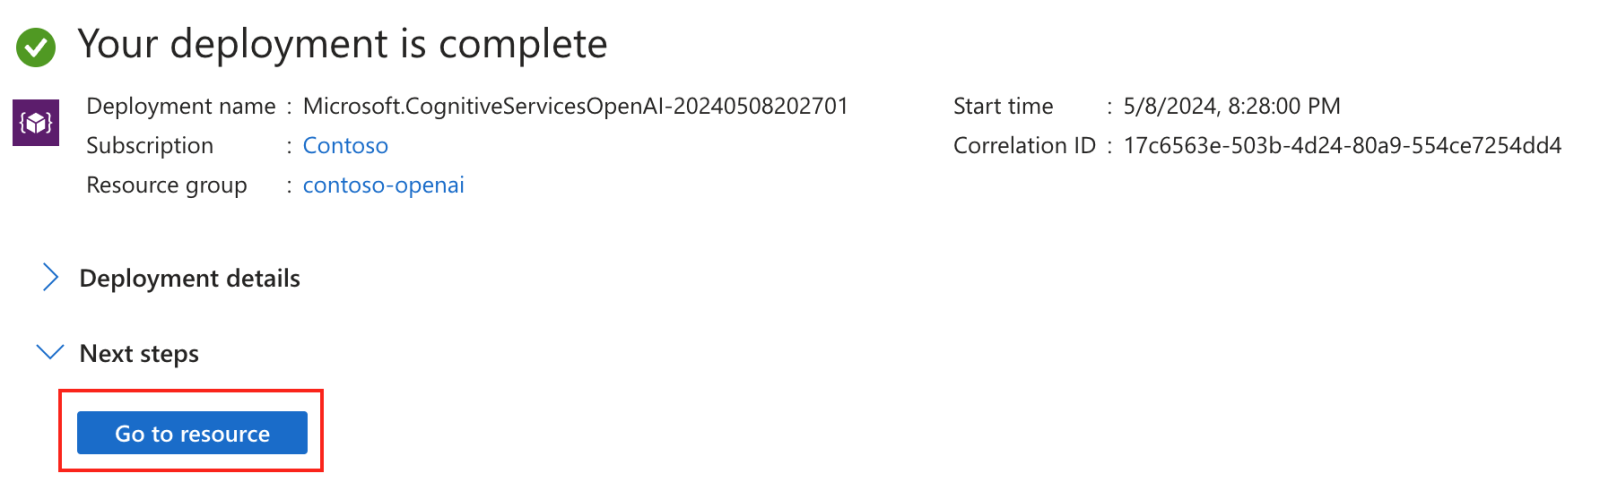
• Confirm your configuration settings and select Create.
• The Azure portal displays a notification when the new resource is available. Select Go to resource.
Step 3: Create a Model Deployment from the model catalog
After creating the Azure OpenAI resource, you need to deploy the language model that will be used by the AI Work Item Assistant.
To deploy a model, follow these steps:
1. Open the Azure OpenAI Resource:
• Navigate to Resource Groups in the Azure Portal and select your resource group.
• Click on the Azure OpenAI Service you just created.
2. Deploy a Model:
• In the OpenAI service blade, go to Model Deployments.
• Click Add to deploy a new model and configure the following fields:
⁌ Select a model: Model availability varies by region. For a list of available models per region, see the Model summary table and region
availability.
⁌ Deployment name:
Choose a name carefully. The deployment name is used in the AI Work Item Assistant Extension to call the model
by using the client libraries and the REST APIs.
⁌ Deployment type:
Standard, Global-Batch, Global-Standard, Provisioned-Managed. Learn more about deployment type options.
⁌ Advanced options (Optional):
You can set optional advanced settings, as needed for your resource.
1. For the Content Filter, assign a content filter to your deployment.
2. For Tokens per Minute Rate Limit, adjust the Tokens per Minute (TPM) to set the effective rate limit for your deployment. You can
modify this value at any time using the Quotas menu. Dynamic Quota allows you to take advantage of more quota when extra
capacity is available.
• Select a model from the dropdown list.
• Enter a deployment name to identify the model.
• Click Create to deploy the model.
Note the Azure OpenAI service endpoint, api key and deployment model name created above for configuring the details in the AI Work Item Assistant Azure OpenAI settings tab in the next steps.
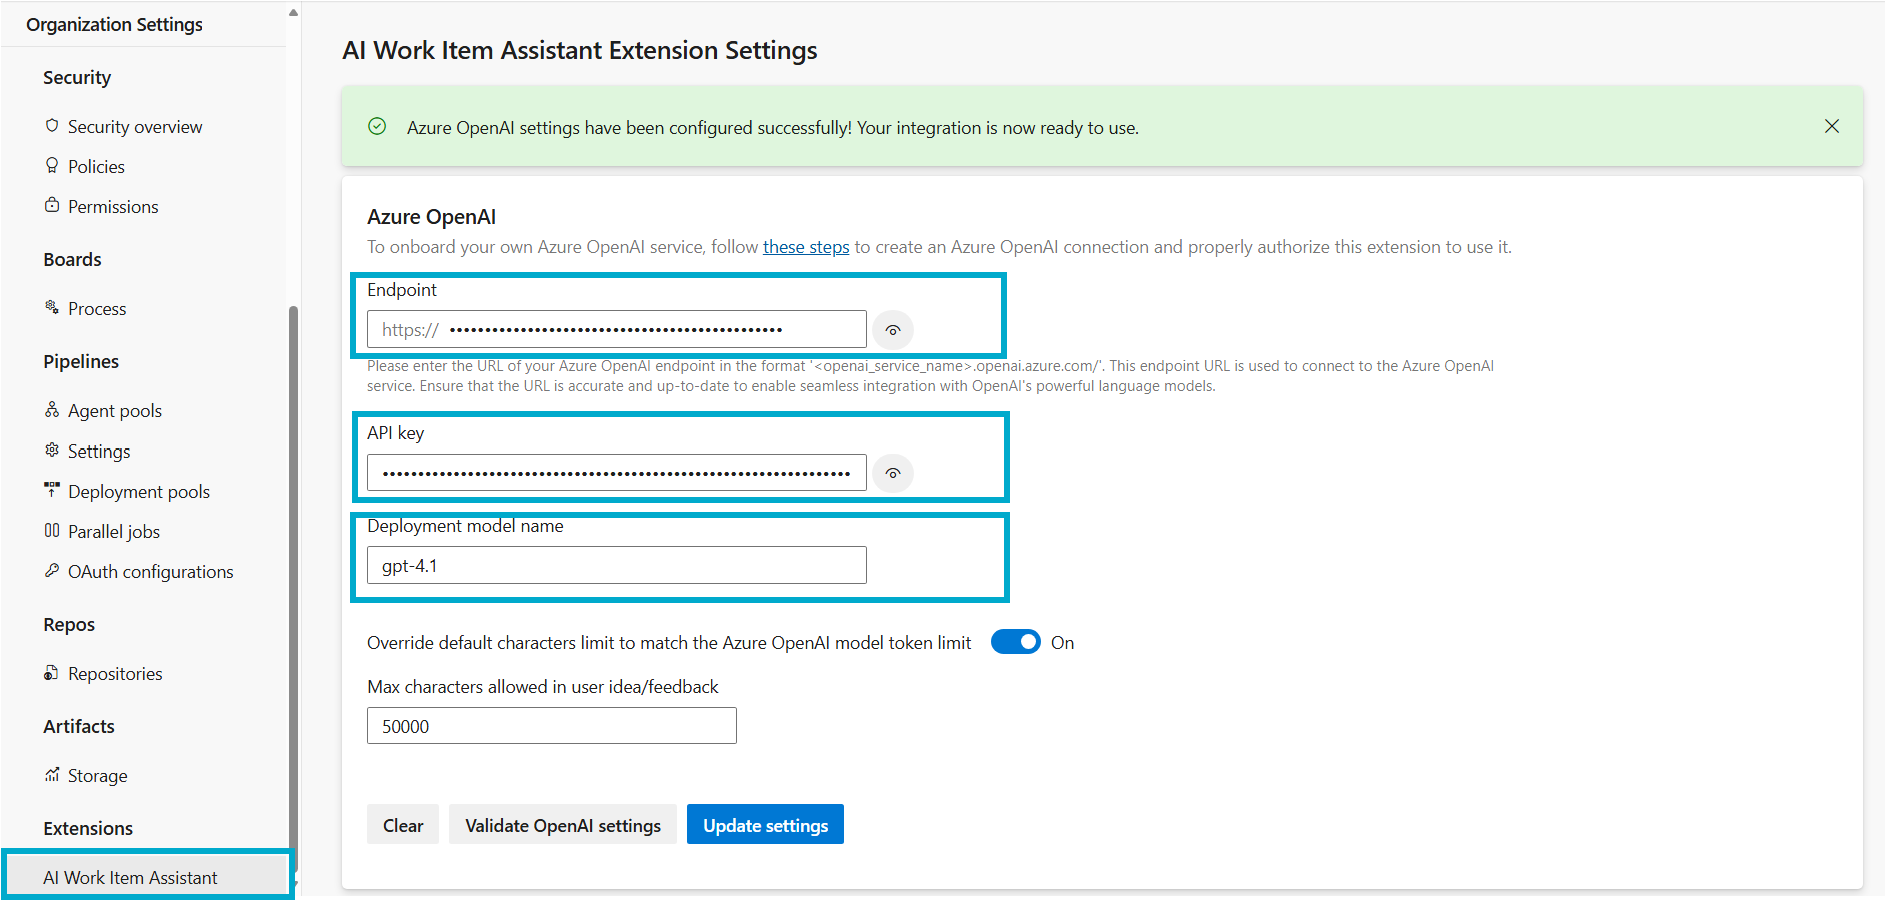
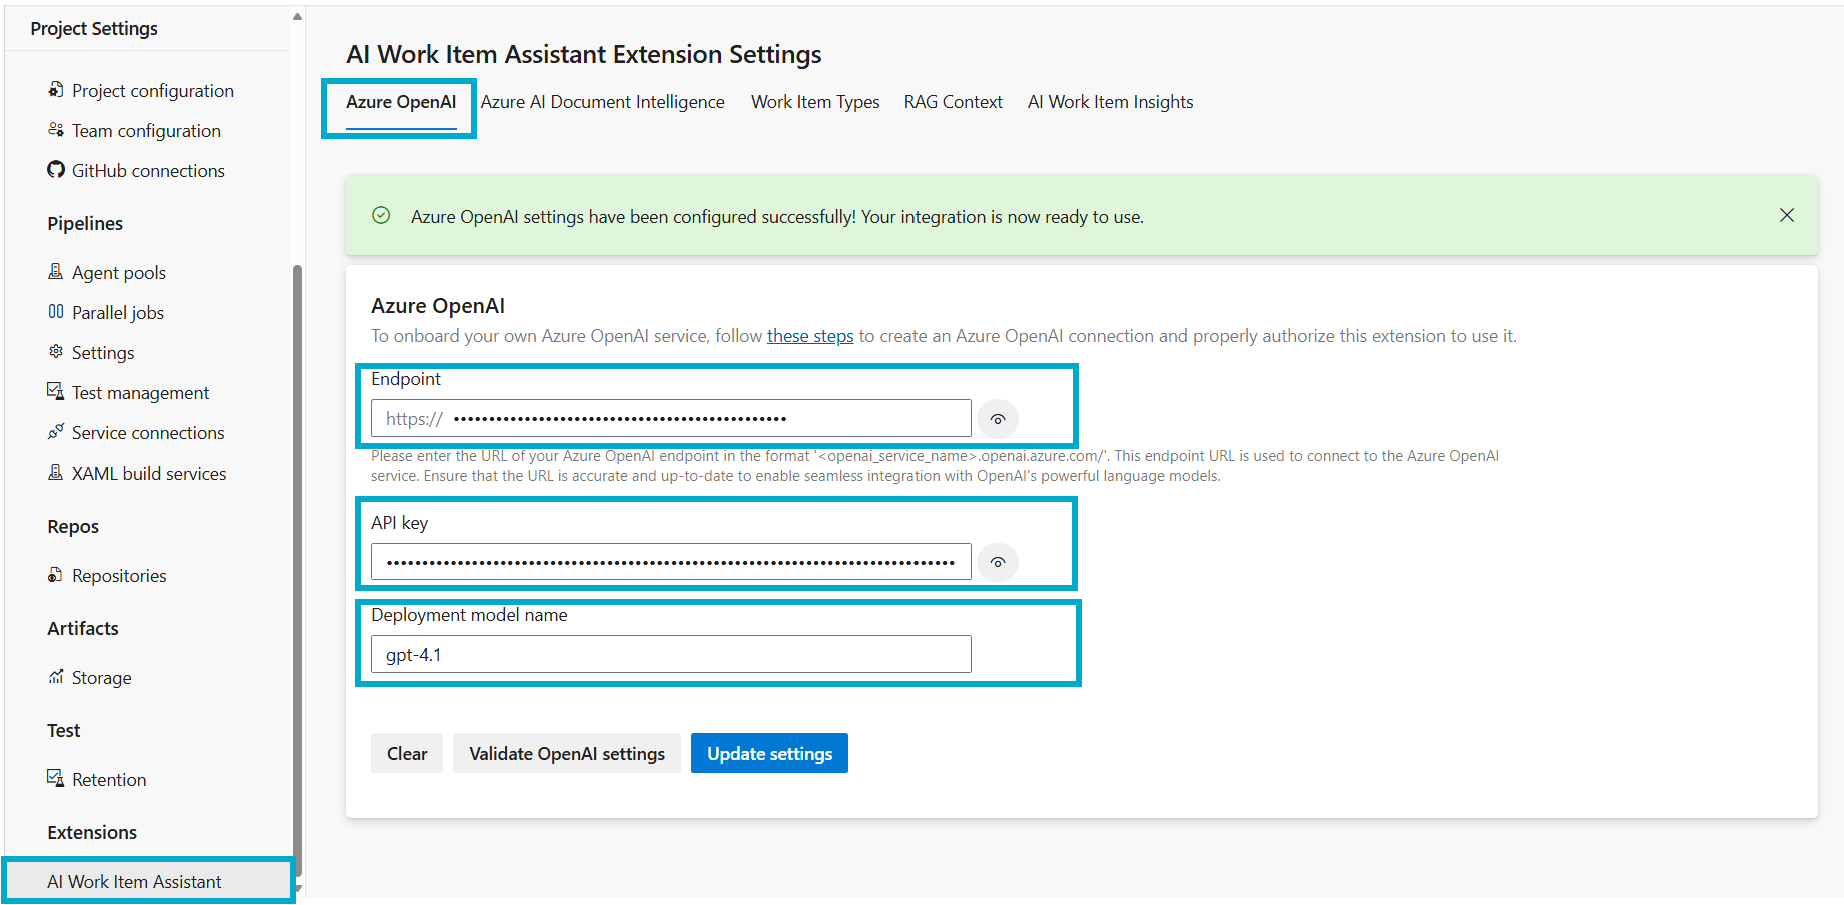
Step 4: Configure the OpenAI Connection
1. Visit the Extension Settings: Open the AI Work Item Assistant extension settings in Azure DevOps organization or project.
2. Update the Azure OpenAI Endpoint, API Key and Deployment Model: Locate the Azure OpenAI integration tab. Update the Azure OpenAI Service endpoint, apikey and deployment model as configured in the previous step.
For a detailed guide on setting up the Azure OpenAI connection at the project or organizational level, please follow the steps provided in Azure Open AI Connection and Validation guide.
To continue, please return to the installation steps to ensure all configurations are correctly applied. Following the setup process carefully guarantees a smooth and successful installation experience.
Back to Installation StepsNote
When the Azure OpenAI Service is configured at the organizational level, it applies to all projects within that organization in Azure DevOps (ADO). Conversely, if it is set up at the project level, it will only affect that specific project.